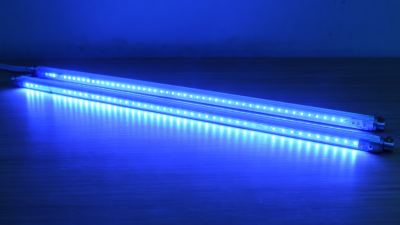
Choosing the right Led Uv Curing Lamp is more than comparing wattage or purchase price. The correct choice depends on the material, photoinitiator, curing wavelength, irradiance, exposure time, and working distance. A lamp that performs well on a thin adhesive may fail on a printed coating or a deeper resin layer. The visible result can be deceptive. The surface may feel dry while the underside remains soft. That happened during a small production trial, and it showed why appearance alone cannot confirm a complete cure.
This guide examines the practical factors behind reliable lamp selection. It explains how wavelength compatibility affects curing performance and why measured irradiance matters more than marketing claims. It also considers beam uniformity, heat control, lamp lifespan, power stability, and replacement support. In a workshop, a few millimeters of extra distance can reduce delivered energy significantly. Dust on a lens can create another weak curing area. Small details matter.
Safety and process control deserve equal attention. Operators should follow the manufacturer’s instructions, use suitable eye and skin protection, and verify the process with approved testing methods. Experienced users still need data. Assumptions can become expensive mistakes. Some selection guides oversimplify the decision, especially when they treat higher power as universally better. A dependable Led Uv Curing Lamp should fit the complete application, not just one impressive specification. This article offers a practical framework for comparing options, identifying limitations, and making a more defensible purchasing decision.
Choosing an LED UV curing lamp starts with the material, not the lamp.
Define the chemistry, coating thickness, target cure speed, and acceptable surface finish. Confirm the photoinitiator’s absorption range. Common curing trials use 365, 385, or 395 nm LEDs. Published RadTech technical papers often report irradiance from 1 to 20 W/cm² and doses from 0.5 to 5 J/cm². These figures are useful references, not automatic settings.
Measure the real dose at the work surface. A lamp may deliver 10 W/cm² at its window, but distance, optics, and heat can reduce performance. Measure it. Use a calibrated radiometer, then record line speed, exposure distance, and substrate temperature. The U.S. Department of Energy’s solid-state lighting research reports repeatedly identify thermal management as a critical factor in LED performance. Excess heat can shift output and shorten service life.
Application conditions can change the result unexpectedly. Clear films may cure quickly, while pigmented or filled materials need deeper spectral penetration. Oxygen inhibition may leave a tacky surface, especially during low-dose curing. Try nitrogen only when the process justifies its cost and complexity. Small details matter. I have seen acceptable laboratory results fail on production lines because the conveyor speed varied slightly. Allow a practical safety margin, but avoid simply increasing power. That can overheat the substrate without improving cure quality. Validate adhesion, hardness, conversion, and aging under real operating conditions. Industry data guides the trial; process evidence decides the lamp.
Wavelength is the first practical filter. Most UV-curable materials respond to specific photoinitiator absorption ranges. A 365 nm lamp can suit deep activation, while 385, 395, or 405 nm often supports faster surface curing. Always check the adhesive or coating datasheet. Guessing is expensive.
Intensity must be measured at the actual working distance, not only at the lamp window. The curing dose equals irradiance multiplied by exposure time. For example, 1,000 mW/cm² applied for two seconds delivers 2 J/cm². RadTech’s UV+EB Technology Roadmap highlights dose control and process monitoring as key reliability factors. The U.S. Department of Energy’s 2024 solid-state lighting research report also notes that UV LEDs face greater thermal-management challenges than visible LEDs. Heat can reduce output. It can also shorten service life.
Tips: Map the curing area with a calibrated radiometer. Compare center and edge readings. A lamp may advertise high intensity, yet leave a soft strip near the edge. Select a curing window slightly larger than the part, but avoid unnecessary overlap. Keep the lamp close when possible. Working distance changes exposure sharply. Start with the material supplier’s recommended dose, then test adhesion, hardness, and tack. Real production conditions are imperfect. Dust, temperature, and uneven surfaces matter. I would not trust one successful sample. Run repeated trials across the full area before approving the process.
How to Choose the Right LED UV Curing Lamp?
Selecting the lamp design starts with the curing pattern. A linear lamp suits wide, continuous materials, while a spot lamp fits small parts and focused repairs. Check the required wavelength, working distance, and irradiance at the surface. The lamp should match the chemistry of the UV material, not merely its advertised power. Uniform light matters. Dark edges or weak center zones can leave an uneven cure.
Size should follow the usable curing area, not the outer housing. Measure the part width, movement speed, and overlap between passes. A lamp that is too narrow may create visible bands. One that is oversized can waste energy and space. Leave room for cable routing and maintenance access. Measure twice. I have seen compact systems fail because their mounting brackets blocked airflow.
Cooling affects output stability and service life. Air cooling is practical for moderate workloads and easier to maintain. Water cooling handles higher thermal loads, but it needs clean circulation, leak protection, and regular inspection. Keep the lamp away from dust, solvents, and heat-sensitive surfaces. Install a temperature sensor when process variation is costly. Record irradiance and surface temperature during trials. Results can drift as windows become dirty or LEDs age. That detail is easy to overlook. A short production test often reveals problems that a specification sheet cannot.
How to Choose the Right LED UV Curing Lamp?
Choosing the right LED UV curing lamp starts with measurable efficiency. Energy efficiency is more than rated wattage. Compare useful UV dose per cured part, not electricity alone. In a workshop, I would measure irradiance at the work surface with a calibrated meter. Then record curing time, lamp distance, and cooling load. A lamp that runs cooler may reduce ventilation demand. That matters. My early assumption was wrong: the highest power setting did not always produce the fastest reliable cure. Heat distorted a thin plastic sample.
Look for adjustable intensity, timed exposure, recipe storage, and temperature feedback. Closed-loop control can compensate for gradual output changes. Manual timers are simple, but they invite inconsistent results. Ask whether settings remain stable after warm-up. A clear display showing dose is more useful than a bright status light. However, extra features are not automatically useful. Operators need training and readable procedures. I once treated a convenient preset as proof of quality. It was not; the resin surface cured while the deeper layer remained soft.
Safety should be evaluated before productivity. Use an enclosure, interlocked doors, shielding, warning indicators, and an emergency stop. UV leakage should be checked with suitable measurement equipment, not by looking at the glow. Follow technical documentation, a documented risk assessment, and local workplace rules. Ventilation may be needed for odors or airborne byproducts. Keep reflective tools and loose materials away from the exposure area. Inspect seals, sensors, and cooling paths on a scheduled basis. A neglected filter can quietly raise temperature and shorten lamp life.
Compare common UV curing technologies by energy efficiency, control capability, and operational safety. Scores use a technology-level decision matrix rather than data from any specific company or brand.
Energy efficiency considers electrical power converted into useful UV output and heat management. Control capability covers instant on/off operation, intensity adjustment, timed dosing, and feedback control. Safety considers ozone generation, mercury content, thermal exposure, shielding, and interlock requirements. Higher scores indicate a stronger overall selection profile.
Choosing the right LED UV curing lamp starts with compatibility, not advertised intensity. Check wavelength, irradiance, curing area, working distance, and controller communication. A resin may appear cured under blue light, yet remain soft beneath the surface. Request measured data at the actual distance, not only laboratory peak values. Test a small batch using your substrate, coating thickness, and production speed. This practical step can reveal heat buildup, shadowing, or incomplete curing.
Reliability depends on more than diode life. Examine thermal management, cooling fan access, optical window durability, and calibration records. A lamp operating near dust, vibration, or solvent vapor needs protection and regular inspection. Ask whether output can be monitored during production. An independent radiometer can confirm performance more credibly than a sales sheet. Small details matter. Replacement modules should be available, although this assumption may prove expensive with proprietary designs. Check it carefully.
Total operating cost includes electricity, maintenance, downtime, consumables, training, and disposal. Compare curing speed with actual throughput, not brochure claims. A lower-priced unit may require longer exposure or frequent cleaning, increasing labor costs. Calculate the cost per cured part over several years. Include energy use at your real duty cycle. Do not ignore integration time. Compatibility errors can turn an efficient lamp into idle equipment. Clear documentation and responsive technical support also have measurable value, even when invoices do not show it.